


Use this guide to choose and try a software testing tool for an existing application or code project. You will identify what needs testing, compare suitable tool types, set up one tool, run a small test, and decide how to repeat the check. It is written for beginners who can open a project and follow its setup instructions, even if they have not configured testing tools before. Allow about 1-2 hours for an initial setup; connecting tests to a shared build system may take longer.

Get business pricing on monitors, keyboards and dev gear
- Business-only prices and quantity discounts
- Tax-exempt purchasing
- Multiple users, one account, clear invoices
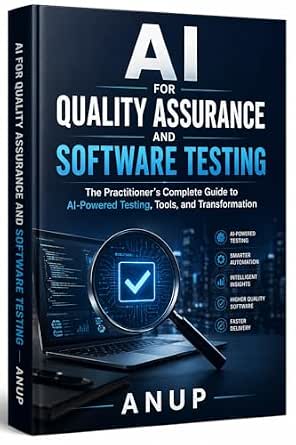
AI for Quality Assurance and Software Testing: The Practitioner’s Complete Guide to AI-Powered Testing, Tools, and Transformation
- ✔ Format: Practitioner’s guide
- ✔ Primary focus: AI-powered quality assurance and software testing
- ✔ Coverage: Tools, methodologies, and implementation strategies

Spec-Driven Software Testing with AI
- ✔ Series: Spec-Driven AI Engineering Series
- ✔ Primary focus: Spec-driven software testing with AI
- ✔ Topics: AI and test automation

All You Need to Know About Software Testing: From Beginner to Job-Ready QA Engineer
- ✔ Primary focus: Software testing fundamentals and QA career preparation
- ✔ Intended level: Beginner to aspiring QA engineer
- ✔ Testing approaches: Manual and automated testing
Difficulty: Beginner | Time: 1-2 hours
What You’ll Need
Tools & Materials:
- A computer with the project’s supported development environment installed
- Access to the project files and permission to install or run development tools
- A terminal, command prompt, or development environment suited to the project
- A test account or non-production sample data if the application needs them
Knowledge:
- How to open the project and run the application or its existing checks
- Basic familiarity with the language or framework used by the project
- How to read setup instructions and copy a command into a terminal
Set aside a small, representative feature to test, such as a calculation, form submission, or page load. Use a development environment and sample data. Do not run exploratory tests against live users, production records, or services that could send real messages or charge money.
AI for Quality Assurance and Software Testing: The Practitioner’s Complete Guide to AI-Powered Testing, Tools, and Transformation
This is the most rounded choice for readers trying to understand where AI fits across quality assurance, rather than simply adding an AI feature to one test step. Its stated coverage spans practical tools and methods as well as implementation strategy and organizational change. That broader lens gives it an edge over Spec-Driven Software Testing with AI, which is more tightly aimed at test-suite engineering, and makes it relevant to people shaping a QA program as well as those doing hands-on testing.The breadth also comes with a higher entry bar. Readers who are new to QA or AI may find the practitioner-oriented material demanding, while those seeking a beginner’s route through manual testing and browser automation may find All You Need to Know About Software Testing easier to follow. Its industry emphasis may also constrain how directly some examples transfer to other settings. We’d choose it when the goal is to evaluate AI adoption across a testing workflow, and skip it if we need a gentle introduction or a narrowly technical reference for a specific framework.
Pros:
- Connects AI testing concepts with practical implementation guidance.
- Covers both testing workflows and organizational transformation.
- Offers a broader QA perspective than the spec-driven engineering guide.
- Can help practitioners frame decisions about where AI may fit in testing.
Cons:
- May assume prior QA or AI knowledge, which can make the material difficult for beginners.
- The stated industry emphasis may limit the direct relevance of some examples.
- The description does not identify specific tool versions or detailed platform coverage.
Best for: QA practitioners and technical leads assessing how to introduce AI methods and tools into an existing testing workflow.
Not ideal for: Readers new to testing or AI, or buyers who need tool-specific reference material for an unrelated industry.
Bottom line: We rank this first for readers who want the broadest practical view of AI in QA, provided they already have some testing context.
“We rank this first for readers who want the broadest practical view of AI in QA, provided they already have some testing context.”
Spec-Driven Software Testing with AI
When our main goal is to make automated tests more reliable and connect them to the software delivery process, this is the most directly focused option in the lineup. It brings together spec-driven testing, TDD, API testing, and CI/CD, with AI framed as part of the engineering workflow. Compared with the first-ranked book, it trades organization-wide breadth for a sharper focus on how engineers build and maintain test suites.That specificity is useful for developers and QA engineers already comfortable with testing concepts, but it is also the reason beginners may want to start elsewhere. The guide is not presented as a survey of foundational manual QA skills like the third pick. Its focus on AI workflows may also date more quickly as tools change, so readers should treat it as a way to reason about methods rather than a guarantee that every tool detail will remain current. Choose it when test automation and delivery integration are the problem in front of us; choose the broader AI guide when adoption strategy matters just as much.
Pros:
- Centers on building reliable, automated test suites.
- Connects testing with TDD, API coverage, and CI/CD workflows.
- Has a more focused engineering scope than the broader AI transformation guide.
- Treats AI as part of a structured testing process.
Cons:
- Its niche focus may be difficult for readers without testing experience.
- AI tooling changes quickly, so tool-specific guidance may need updating.
- The description does not name particular platforms or provide edition details.
Best for: Software engineers and QA automation practitioners who want to organize AI-assisted tests around specifications, TDD, APIs, and CI/CD.
Not ideal for: New learners who need an introduction to testing fundamentals or readers seeking broad organizational guidance on AI adoption.
Bottom line: We recommend this focused guide when test-suite design and automation are the priority, but not as a first textbook for QA beginners.
“We recommend this focused guide when test-suite design and automation are the priority, but not as a first textbook for QA beginners.”
All You Need to Know About Software Testing: From Beginner to Job-Ready QA Engineer
For someone starting from zero or building toward a QA role, this is the most accessible-sounding entry in the group. Its scope runs from manual testing to automation, APIs, Selenium, Playwright, and CI/CD, so readers can see how foundational test work connects to common engineering practices. That makes it a more natural starting point than the practitioner AI guide or the spec-driven book, both of which assume a narrower and more technical interest.The tradeoff is depth: a guide designed to take readers from beginner to job-ready breadth may not give experienced practitioners the detailed AI adoption framework of the first pick or the concentrated suite-design approach of the second. The supplied description also does not spell out its lesson structure, exercises, or how it handles tool versions, so readers should not assume a complete course or current reference for every framework. We’d select it to build a map of QA skills before specializing, and look elsewhere if our immediate challenge is deploying AI across an established test organization.
Pros:
- Covers both manual and automated testing practices.
- Includes APIs, Selenium, Playwright, and CI/CD in its stated scope.
- Is aimed at people building skills for QA engineering work.
- Offers a broader foundation than the specialist spec-driven guide.
Cons:
- Its beginner-friendly breadth may not provide advanced implementation depth.
- The description does not specify exercises, curriculum structure, or tool versions.
- It is less directly focused on AI testing than the other two picks.
Best for: New QA learners who want an overview spanning manual testing, automation, APIs, and familiar browser testing frameworks.
Not ideal for: Experienced QA engineers seeking advanced AI implementation strategy or detailed guidance on a particular automation stack.
Bottom line: We’d start here to build broad QA foundations, then move to a specialist guide when we know which testing workflow needs improvement.
“We’d start here to build broad QA foundations, then move to a specialist guide when we know which testing workflow needs improvement.”
As an Amazon Associate we earn from qualifying purchases.
Before You Start
Find the project’s README, contribution guide, or existing test configuration before choosing a tool. A project may already use a test framework, browser automation package, or build service, and adding a competing tool can create extra setup. Decide what result you need: a fast check of a function, a check of several components working together, or a browser-based check of a user flow. These goals call for different tools.
Keep the first attempt small. Choose one test area and one expected result. Record the project’s current working state or use a separate branch if available, so you can recognize changes caused by setup. Check whether the tool supports the project’s language, operating system, and framework version. Installation commands vary by project, so use the tool’s official instructions and the project’s own conventions.
Step-by-Step Instructions
Step 1: Define the check you need
Write one sentence describing the behavior to check, the input or action, and the result you expect. For example: “When a user submits a valid email address, the form shows a confirmation.” Choose a behavior that matters and can be observed without relying on vague judgments such as “the page feels right.” Note any required setup, such as a test account or sample record.
Tip: Start with a frequent or business-critical behavior that can be checked safely in a development environment.
Check: You have one testable behavior, a clear starting condition, and a result you can recognize.
Step 2: Identify the appropriate tool type
Match the check to a testing layer. Use a unit testing framework for a small function or class in isolation. Use an integration testing tool when you need to check that connected parts, such as an API and database, work together. Use browser automation for a user flow that depends on visible pages, buttons, or navigation. Use a performance or security tool only when those are the specific concerns you need to measure.
Search the project files and setup guide for existing test commands and dependencies. If the project already has a suitable tool, begin with it. If it does not, shortlist tools that support the project’s language and framework and have current documentation.
Tip: A tool’s popularity does not make it a good fit if it cannot run with the project’s versions or environment.
Check: You can name the test layer you need and have identified either an existing tool or a compatible candidate.
Step 3: Compare candidates against project needs
Compare two or three candidates using the same practical criteria: language and framework support, installation method, documentation quality, reporting clarity, and fit with the team’s current workflow. Check whether the tool runs locally and whether it can later run in the project’s build system. Read the official install and first-test instructions before committing to a choice.
Prefer the simplest candidate that can check your chosen behavior and produce a result you can understand. Note any license, service account, paid feature, or external service requirement before setup. Do not select a tool just because it offers features your current task does not need.
Tip: For a first trial, avoid tools that require a large platform migration or extensive infrastructure changes.
Check: You have selected one tool and can explain how it fits the project and the check you defined.
Step 4: Set up the tool in the project
Install the tool by following its official instructions for the project’s language and package manager. Use the version and dependency method already used by the project. Keep configuration in the project’s normal location, and avoid changing unrelated dependencies or application behavior. If the setup asks for credentials, use a development-only account and store secrets in the project’s approved local secret mechanism, not in source code.
Read the setup output and compare the changed files with the project’s usual conventions. If installation instructions conflict with the README or existing configuration, pause and resolve that mismatch before adding more changes.
Tip: Do not copy a command intended for a different framework or package manager; installation examples are often specific to a project setup.
Check: The tool’s setup completes, the project still opens or builds as expected, and the added files are limited to the intended test setup.
Step 5: Create one representative test
Create a test from the tool’s smallest documented example, then adapt it to the behavior you selected. Give the test a name that describes the expected behavior. Set up only the required input or test data, perform the action, and check the expected result. Keep test data separate from production data and make the test repeatable by resetting any state it changes.
If you are testing a browser flow, select stable page elements and wait for visible results rather than relying on arbitrary delays. If you are testing a function, include a realistic input and a meaningful expected value. Avoid adding several unrelated checks to your first test; a focused test is easier to debug.
Tip: A test should fail when the expected behavior is missing and pass when it is present. That confirms the check is meaningful.
Check: The test describes one behavior, uses safe data, and checks an observable expected result.
Step 6: Run the test and inspect the result
Run the documented test command from the project’s expected directory. Read the full result, including the test name, pass or fail status, and any error details. If it passes, run it once more to check that the result is repeatable. If it fails, determine whether the failure comes from the behavior under test, missing setup, incorrect test data, or a tool configuration problem before changing the application.
Keep the command and any required setup notes with the project’s existing documentation or team workflow. Do not treat a green result as proof that every part of the application works; it only reports the checks that actually ran.
Tip: When a test passes locally but behaves differently on another machine, compare versions, environment variables, and test data first.
Check: The test produces a readable result, and a repeated run gives the same outcome.
Step 7: Make the check repeatable
Document the command, required setup, and expected result where project contributors will find them. If the team uses a continuous integration service, add the test to its existing workflow only after the local run is reliable and the project’s conventions are clear. Keep the test fast enough for its intended place in the workflow, and arrange for failures to show useful output.
Review the resulting configuration and run the documented command from a clean project state if practical. Ask a teammate to follow the instructions when the project is shared; unclear setup steps often appear only when someone else tries them.
Tip: Start with a local repeatable command. Add shared automation after you know the test can run without manual, undocumented steps.
Check: Another contributor can find the instructions and run the check with the same expected result.
Common Mistakes to Avoid
- Choosing a tool before checking the project’s existing test setup. — Inspect setup files and documentation first. Extend a suitable existing tool when possible, and confirm that a new candidate supports the project’s language and versions.
- Trying to test too many behaviors in the first test. — Check one behavior with one clear expected result. Add more tests after the first one runs reliably.
- Using live accounts or production data during setup. — Use a development environment, test account, and sample records. Keep credentials out of source code and avoid actions that could affect real users.
- Treating a passing test as proof that the whole product is correct. — Describe exactly what the test covers, then add checks for other important behaviors and layers as needed.
Troubleshooting
Problem: The install command fails or reports incompatible versions.
Solution: Check the project’s supported language and framework versions against the tool’s official requirements. Use the project’s normal package manager and consult its setup guide before changing versions or dependencies.
Problem: The test runner starts but cannot find the test.
Solution: Confirm that the test file is in the expected directory, follows the configured naming pattern, and is being run from the correct project directory. Compare its location and name with the tool’s documented example.
Problem: The test fails even though the feature appears to work.
Solution: Read the failure details and verify the test input, setup, expected value, and environment. For browser checks, confirm that the page has reached the expected state before checking it. Fix the test only when its expectation is wrong; fix the application when the behavior is wrong.
Problem: The test passes once and fails on a later run.
Solution: Look for state left behind by the previous run, shared test data, timing assumptions, or reliance on network services. Reset the test data and replace arbitrary waits with checks for a specific result.
What Success Looks Like
You have selected a tool that supports the project and fits the type of behavior being checked. At least one focused test runs with safe data, reports a clear pass or fail result, and gives the same outcome when repeated. The project contains enough setup and command guidance for another contributor to run that check. The documented scope makes clear what the test covers and what still needs separate checking.
Next Steps
Add tests for the next most important behaviors, keeping each check focused and repeatable. Review failures when the application changes, and update tests when intended behavior or test setup changes. If the tool is useful locally, discuss adding it to the project’s shared build workflow using the team’s existing process. Revisit the tool choice when the project changes language, framework, or deployment needs.
Frequently Asked Questions
Which software testing tool should I start with?
Start with the tool already configured for the project if it can check your chosen behavior. Otherwise, choose a tool that supports the project’s language and framework and has clear setup instructions. The right choice depends on whether you are checking isolated code, connected components, browser behavior, performance, or security.
Do I need to buy a testing tool?
Not always. Many projects use open source test frameworks, and some commercial tools offer free plans. Check the license, usage limits, required services, and team policy before adopting one. Choose based on the project’s needs rather than price alone.
What should I do if the first test fails?
Read the reported error and identify whether the failure is in setup, test data, the test itself, or the feature. Confirm the expected result independently. Correct the source of the failure, then run the test again and check that the result is repeatable.
When should I add tests to continuous integration?
Add a test to the shared build workflow after it runs reliably from a documented command and does not need undocumented manual setup. Start with a quick check that gives useful failure details. Follow the project’s existing workflow for secrets, test data, and environment configuration.
Does one test tool cover every kind of testing?
Usually not. A unit testing framework may be excellent for isolated code but may not check a full browser journey or measure application load. Choose tools to match the checks you need, and avoid adding several tools until a clear gap calls for them.